Getting Started with POLi

Quick start guide to enable POLi

Getting Started


Step 1. ​​​​​​​Complete this form to enable POLi to be linked to your Sporty website.  You will receive an email from Sporty support when POLi has been enabled, ready for you to complete the process to connect.

Step 2. Apply for a POLi Merchant account. ​​​​​​​Click here to sign up for POLi and create a Merchant account. 

Step 3. Once you have your merchant credentials , click Connect to POLi on the Connections page (Dashboard > Admin Settings > Connections).​​​​​​​

Ensure you follow the steps below.

We recommend you have the following information available before getting started:

  • An email and phone number to be linked to the account
  • Organisation details: Phone, Address, NZBN, Authorised representative details.
  • Bank Account details where funds should be paid into and a bank “proof” document like a bank statement.
  • Your organisation logo (this will display when people pay with POLi). 

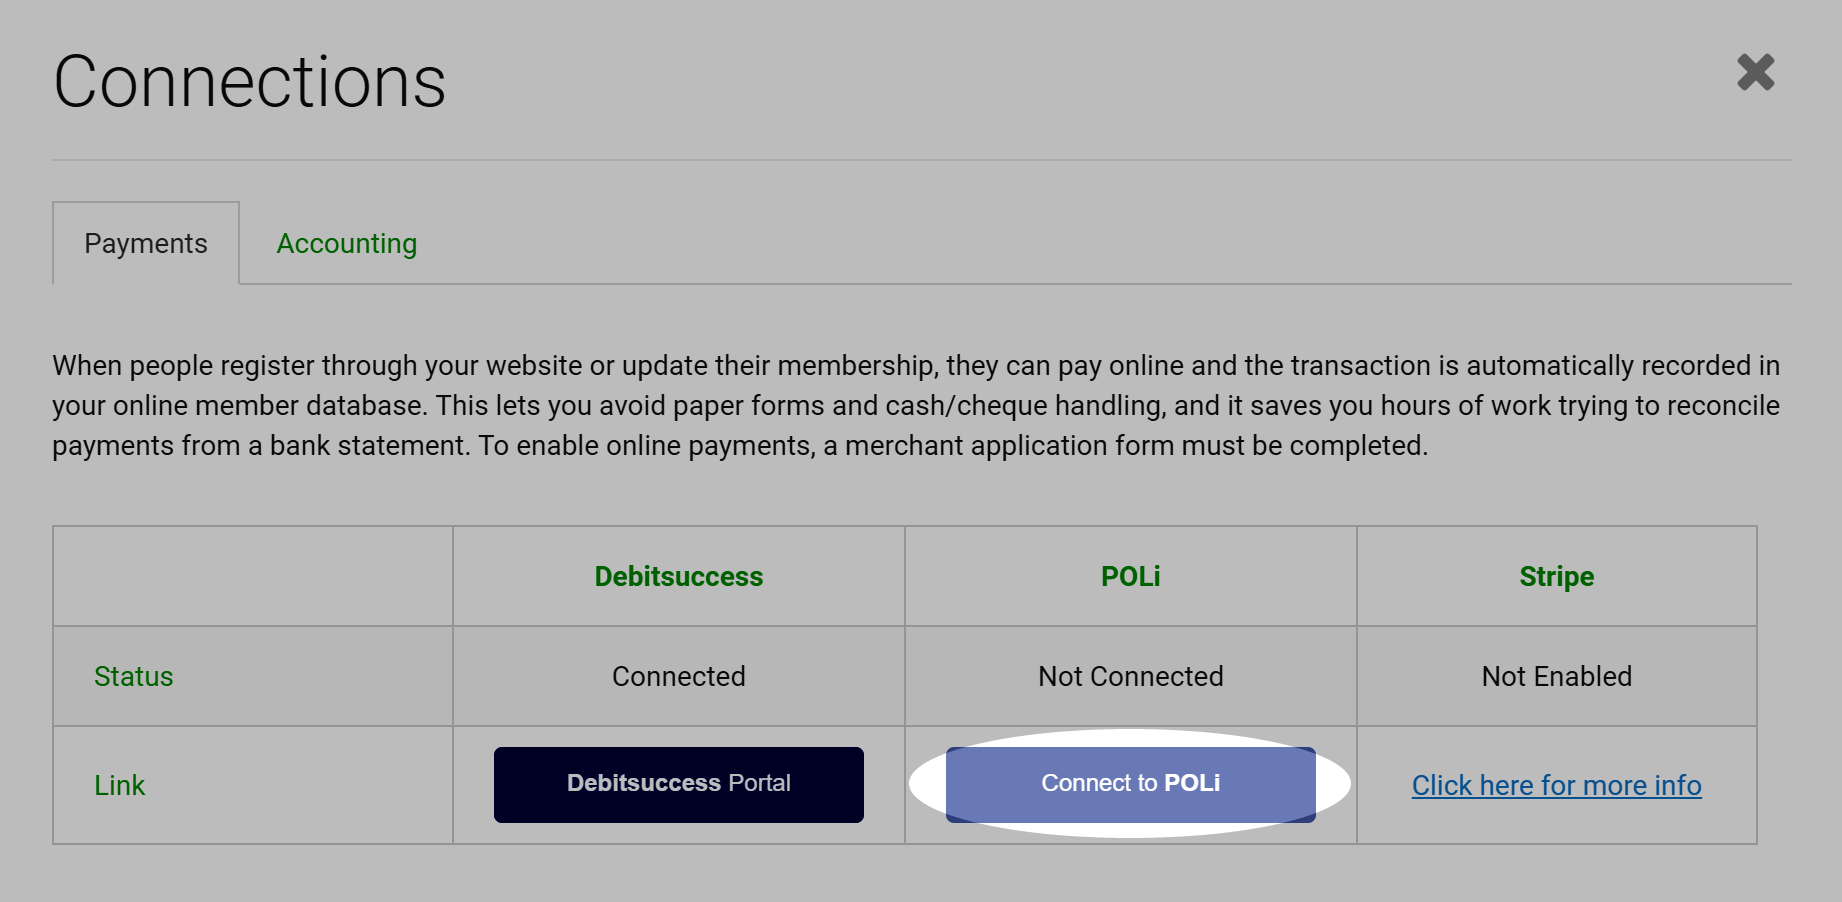
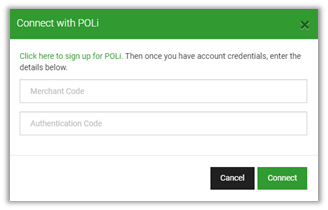
The POLi support team will send you an email with your Merchant Credentials.  This normally occurs within 2 business days. 

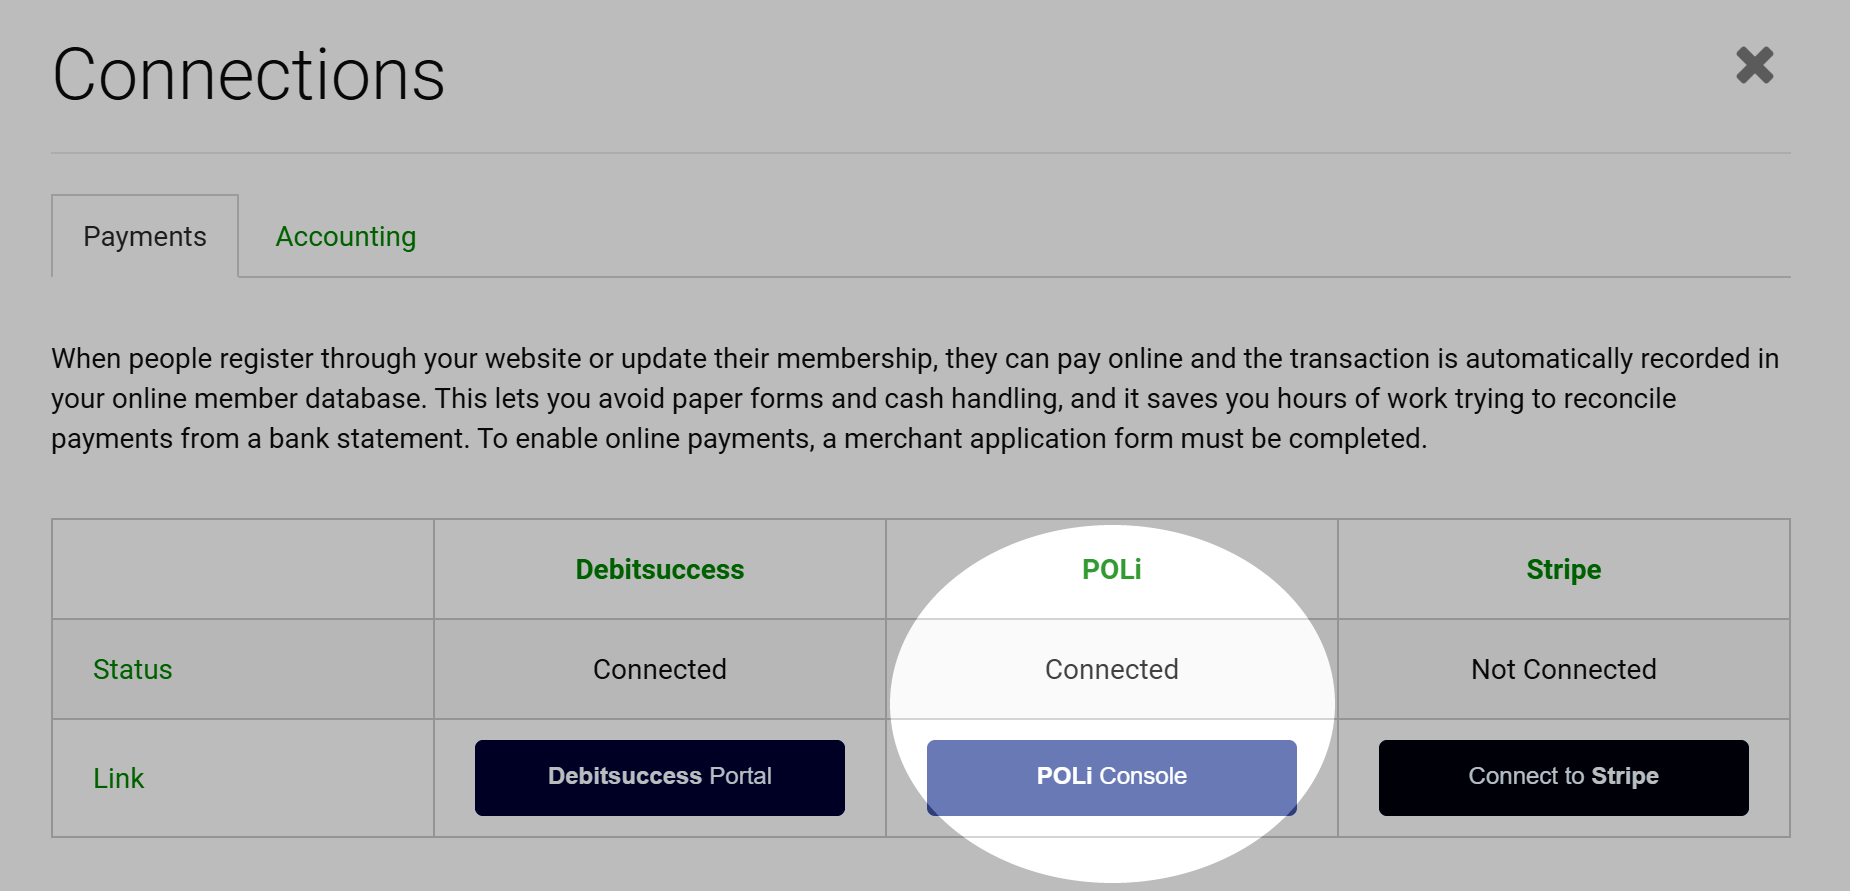
When you have received your POLi merchant credentials, input these and click Connect.   The Online Payments page will change to display POLi Integration: Connected, and a link will be displayed for the POLi Console.

You are now ready to start accepting payments using POLi.

Accepting Payments

To setup your Sporty forms to start collecting payments, please view this article.

Connecting an existing POLi Account

If you already have a POLi merchant account and authentication code, this can be used in Sporty.  Please complete this form so the POLi integration can be enabled in Sporty.

I have more questions about POLi

Please view this support article and for further queries, please contact POLi support.

If you would like to discuss if POLi is the best option for your organisation, please complete the form below.