Getting Started with Stripe

Quick start guide to enable Stripe

Getting Started


​​​​​​​Complete this form to enable Stripe to be linked to your Sporty site. You will receive an email from Sporty support when Stripe has been turned on, ready for you to connect. 

Click Connect to Stripe in the Connections page (Dashboard > Admin Settings > Connections).

Ensure you complete the Stripe merchant account form in the step below.

Now, apply for a Stripe merchant account by clicking the link in the modal displayed in Sporty. ​​​​​​​Click here to sign up for Stripe We recommend you have the following information available before getting started:

  • An email and phone number to be linked to the account 
  • Organisation details: Phone, Address, NZBN, Authorised representative details. 
  • Bank Account details where funds should be paid into 

First, enter the email address that should be linked to the organisation account.  

If you already have a Stripe account, you can enter the email address that you use for that Stripe account here. For more information on connecting an existing Stripe account, please refer to this support article (under section How to Enable Stripe > Connecting an Existing Stripe Account).

If you do not already have a Stripe account, you will be prompted to set a password and provide more information. Follow the prompts to complete your account setup. Once you have submitted your application, you will be redirected to the Sporty Online Payments page where it will indicate that Stripe is now connected.

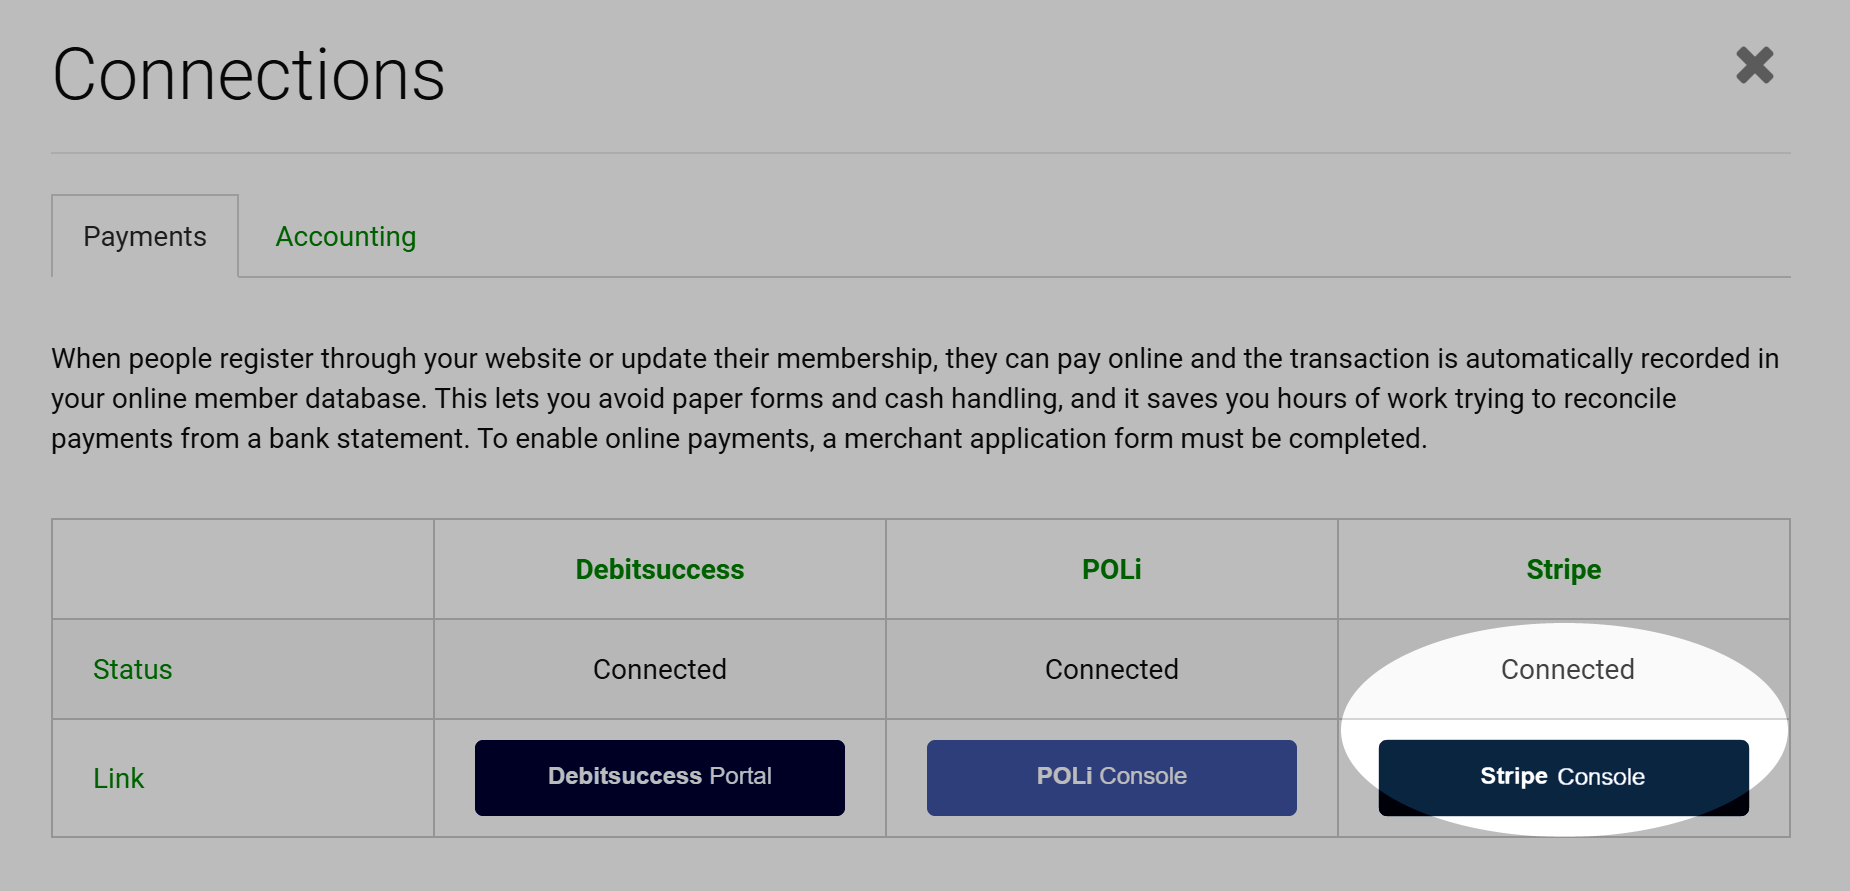
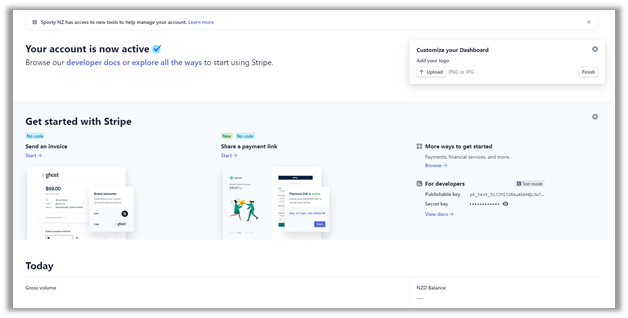
Stripe accounts need to have a mobile number associated with them for the purposes of two-factor authentication. 

Enter the mobile number that should be associated with your organisation’s Stripe account.

You will then be sent a text message and be prompted to input a verification code.  After completing this, your account will now be verified against that mobile number.  Stripe will provide you with an “emergency backup code” that can be used to access your account if you are unable to use the device. Click Next.

Now, enter your organisation’s information.  The type of business will typically be Club, society or other not for profit.

Follow the prompts to enter or find the NZBN for your organisation.  Industry is likely to be “Membership organisation”. 

Enter your Sporty website URL into the business website field, and a short product description.

Enter the executive committee members and your bank account details.

Enter your Customer Support details.   Your organisation name will appear in the statement descriptor.  Modify this if this is not the name that should appear on your customers bank statements.  This is important to reduce the likelihood of chargebacks (where a customer does not recognise a transaction and flags it as potential fraud with their bank).

See Disputes and Chargebacks for more information about chargebacks.

Click Continue. Review the details and click SUBMIT to complete your application. 

On the Sporty connections page, it will show you are now connected to Stripe.

You will receive two emails from Stripe:

  1. Verify your email to start using Stripe
  2. Two-step authentication is now enabled on your account.

Click the link in the verification email to verify your email with Stripe. You will land in the Stripe Dashboard.  You can subsequently access the Stripe Dashboard directly from within your Sporty Dashboard. 


You are now ready to start accepting payments using Stripe.

Accepting Payments

To setup your Sporty forms to start collecting payments, please view this article.

Connecting an existing Stripe Account

If you already have a Stripe merchant account and authentication code, this can be used in Sporty.  Please complete this form so the Stripe integration can be enabled in Sporty.

I have more questions about Stripe

Please view this support article, and for further queries, please contact Stripe support

If you would like to discuss if Stripe is the best option for your organisation, please complete the form below.